Welcome!

We are The Ultimate Survival Companion and our mission is to provide our readers with the most comprehensive and up-to-date information on survival, everyday carry, prepping, and other skills for emergency situations. We aim to empower our readers with the knowledge and tools they need to be prepared for any situation that may arise. Our goal is to create a community of like-minded individuals who share a passion for self-reliance and preparedness
Join Our Newsletter for exclusive content, updates, offers, and a free PDF of the first chapter of the book! Enter your name and email below and click subscribe. It’s that easy!
Showing posts with label Home Steading. Show all posts

Sunday, December 17, 2023

Easy Banana Trees for Gardening Beginners.


Easy Banana Trees for Gardening Beginners.


Introduction

Welcome, Gardeners, Preppers, and Homesteaders. Isn’t it amazing how gardening can transport us to a different world? Today, we’re going to embark on a tropical journey right in our own backyards. We’re going to learn how to plant and care for our very own banana trees. So, grab your gardening gloves, and let’s dig in!

Section 1: Choosing the Right Banana Plant

The first step in our banana-planting journey is choosing the right variety. There are numerous types of banana plants, each with its own unique requirements and characteristics. It’s like going to a plant adoption center - you want to bring home the one that will thrive in your care. Research is key here - consider your local climate, soil type, and personal preferences when making your choice. Remember, the right plant will make all the difference!

Here's a list of banana trees and the conditions they thrive in


Section 2: Selecting the Perfect Location

Just like us, plants have their favorite spots too. Banana plants love the sun and require good drainage to thrive. When choosing a location for your banana plant, look for a sunny spot where water won’t pool. This will ensure your banana plant gets the light and drainage it needs. It’s like finding the perfect home for your new plant baby!


Section 3: Preparing the Soil

Next, let’s prepare the soil. Banana plants prefer rich, fertile soil. Adding organic matter or compost can greatly enhance the quality of your soil. This step will provide your banana plant with the nutrients it needs to grow and produce fruit. Think of it as preparing a comfy bed for your plant.


Section 4: Planting the Banana Tree

Now, we’re ready to plant! Dig a hole that’s twice as wide and deep as the root ball of your banana plant. Place the plant in the hole, ensuring the top of the root ball is level with the soil surface. Backfill the hole with soil, firming it gently around the base of the plant. It’s like tucking your plant into its new bed.

Section 5: Aftercare

Once your banana tree is planted, it’s time for some TLC. Water your plant thoroughly after planting, and apply a layer of mulch around the base to conserve moisture and suppress weeds. Regular fertilization with a balanced fertilizer will also help your banana tree grow strong and healthy. It’s like cooking - the right ingredients make all the difference!


Section 6: Protecting Your Banana Plant

Finally, remember that banana plants are tropical and can be damaged by wind and cold weather. Protect your plant from harsh conditions to ensure it thrives. It’s like wrapping your plant in a warm blanket during a cold night.


Conclusion

And there you have it - a step-by-step guide to planting your own banana tree! With a bit of care and attention, you’ll be well on your way to growing your own tropical paradise. Remember, every plant is a journey, and every journey begins with a single step (or in this case, a single plant!).


What To Do Next?

Have you tried planting your own banana tree? Do you have any tips or experiences to share? We’d love to hear from you in the comments below! Also, don’t forget to check out our YouTube channel where you can find a video about banana tree planting and many other helpful resources. Let’s continue to grow together!

Remember, Homesteading is a journey, not a destination. So, enjoy every step (and misstep) along the way. Happy gardening! 🌱

Wednesday, November 8, 2023

Installing A Backup Hand Pump

 Welcome to “The Ultimate Survival Companion”! In this article, we will guide you through the process of installing a backup hand pump to your water well. This is a great way to ensure that you have access to water even during power outages.


To install a backup hand pump, you will need a few tools and materials. These include a hand pump, a well cap, a well seal, a check valve, a pitless adapter, a T-fitting, and a length of pipe. You will also need a wrench, a hacksaw, and a drill.

Here are the detailed steps to install a backup hand pump:

  1. Remove the existing well cap: Use a wrench to remove the existing well cap. This will give you access to the well casing.

  2. Install the pitless adapter: The pitless adapter is a device that allows you to connect the hand pump to the well casing without having to remove the electric pump. Install the pitless adapter according to the manufacturer’s instructions.

  3. Install the T-fitting: Install the T-fitting on the top of the pitless adapter. This will allow you to connect the hand pump to the well casing.

  4. Install the check valve: Install the check valve on the T-fitting. The check valve will prevent water from flowing back down the well when you are pumping water with the hand pump.

  5. Install the hand pump: Install the hand pump on the T-fitting. Make sure that the hand pump is securely attached to the T-fitting.

  6. Install the well seal: Install the well seal around the hand pump. The well seal will prevent debris from entering the well.

  7. Attach the pipe: Attach a length of pipe to the hand pump. The length of pipe should be long enough to reach the surface.

  8. Test the hand pump: Test the hand pump to make sure that it is working properly. Pump water from the well and check the flow rate.

That’s it! With these simple steps, you can install a backup hand pump to your water well and ensure that you have access to water even during power outages. Stay safe and prepared!


Here is a GREAT video to give you a visual reference:


Sunday, November 5, 2023

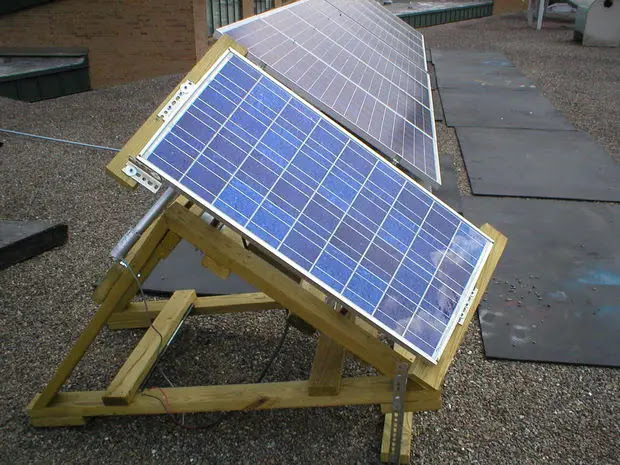
Make The Government Pay YOU to Switch to Solar!


Welcome to The Ultimate Survival Companion! Are you considering switching to solar power? If so, you’re in the right place! In this article, we’ll discuss the various incentives available for solar power in the United States, the United Kingdom, and Canada. We’ll also provide an overview of the Federal Solar Tax Credit, which is the most significant incentive offered by the US government. Additionally, we’ll cover other incentives such as state and local tax credits, net metering, rebates, grants, and sales tax exemptions. Finally, we’ll provide some tips on how to determine your eligibility for these incentives and how to consult with a professional tax advisor to make the most of them. By the end of this article, you’ll have a better understanding of the benefits of solar power and how you can take advantage of the incentives available to you. Let’s get started!


The Federal Government offers incentives to encourage the adoption of solar power. The most significant incentive is the Federal Solar Tax Credit. This tax credit is a dollar-for-dollar reduction in the amount of income tax you would otherwise owe. It can be claimed on federal income taxes for a percentage of the cost of a solar PV system paid for by the taxpayer. The installation of the system must be complete during the tax year. Solar PV systems installed in 2020 and 2021 are eligible for a 26% tax credit. In August 2022, Congress passed an extension of the ITC, raising it to 30% for the installation of which was between 2022-2032. (Systems installed on or before December 31, 2019 were also eligible for a 30% tax credit.) It will decrease to 26% for systems installed in 2033 and to 22% for systems installed in 2034. The tax credit expires starting in 2035 unless Congress renews it. There is no maximum amount that can be claimed .

It is important to note that this is a general overview of the Federal Solar Tax Credit. or more detailed information, please refer to the Department of Energy’s Homeowner’s Guide to the Federal Tax Credit for Solar Photovoltaics . This guide provides an overview of the federal investment tax credit for residential solar photovoltaics (PV). It does not constitute professional tax advice or other professional financial guidance and may change based on additional guidance from the Treasury Department. Please see their published Fact Sheet for additional information .

If you are considering switching to solar power, it is recommended that you consult with a professional tax advisor to determine your eligibility for the Federal Solar Tax Credit and other incentives that may be available to you .

In addition to the Federal Solar Tax Credit, there are other incentives available for switching to solar power. These incentives vary by state and utility company. Some of the most common incentives include:

  1. State and Local Tax Credits: Many states offer tax credits for installing solar panels. These credits can be used in addition to the Federal Solar Tax Credit .

  2. Net Metering: Net metering is a billing arrangement that allows solar panel owners to receive credit for excess electricity they generate and send back to the grid. This credit can be used to offset the cost of electricity they consume when their solar panels are not generating enough electricity .

  3. Rebates: Some utility companies offer rebates to customers who install solar panels. These rebates can help offset the upfront cost of installing solar panels .

  4. Grants: Some states offer grants to homeowners who install solar panels. These grants can help offset the upfront cost of installing solar panels .

  5. Sales Tax Exemptions: Some states offer sales tax exemptions for solar panel installations. This can help reduce the overall cost of installing solar panels 4.

It is important to note that these incentives vary by state and utility company. It is recommended that you consult with a professional tax advisor to determine which incentives are available to you .


Grants for installation: There are several grants available for solar power. The U.S. Department of Energy (DOE) Solar Energy Technologies Office (SETO) supports funding opportunities on photovoltaics, concentrating solar-thermal power, systems integration, technology to market, and soft costs projects. These funding opportunities encourage collaborative partnerships among industry, universities, national laboratories, federal, state, and local governments and non-government agencies and advocacy groups. Solicitations may include financial or technical assistance .


In the UK, there are two grants that may help you buy solar panels for your home: the Energy Company Obligation scheme (ECO4) and the Home Upgrade Grant. ECO4 can provide up to £14,000 towards energy-saving initiatives for your home if you qualify..

The Canadian government has also announced a grant for homeowners to make energy-efficient retrofits to their primary residences. Homeowners will be able to receive grants of up to $5,000 to make energy-efficient retrofits to their primary residences, and up to $600 to help with the cost of home energy evaluations .

I hope this information helps!


The Federal Government offers incentives to encourage the adoption of solar power. The most significant incentive is the Federal Solar Tax Credit. This tax credit is a dollar-for-dollar reduction in the amount of income tax you would otherwise owe. It can be claimed on federal income taxes for a percentage of the cost of a solar PV system paid for by the taxpayer. The installation of the system must be complete during the tax year. Solar PV systems installed in 2020 and 2021 are eligible for a 26% tax credit. In August 2022, Congress passed an extension of the ITC, raising it to 30% for the installation of which was between 2022-2032. (Systems installed on or before December 31, 2019 were also eligible for a 30% tax credit.) It will decrease to 26% for systems installed in 2033 and to 22% for systems installed in 2034. The tax credit expires starting in 2035 unless Congress renews it. There is no maximum amount that can be claimed .

It is important to note that this is a general overview of the Federal Solar Tax Credit. or more detailed information, please refer to the Department of Energy’s Homeowner’s Guide to the Federal Tax Credit for Solar Photovoltaics . This guide provides an overview of the federal investment tax credit for residential solar photovoltaics (PV). It does not constitute professional tax advice or other professional financial guidance and may change based on additional guidance from the Treasury Department. Please see their published Fact Sheet for additional information .

If you are considering switching to solar power, it is recommended that you consult with a professional tax advisor to determine your eligibility for the Federal Solar Tax Credit and other incentives that may be available to you .

In addition to the Federal Solar Tax Credit, there are other incentives available for switching to solar power. These incentives vary by state and utility company. Some of the most common incentives include:

  1. State and Local Tax Credits: Many states offer tax credits for installing solar panels. These credits can be used in addition to the Federal Solar Tax Credit .

  2. Net Metering: Net metering is a billing arrangement that allows solar panel owners to receive credit for excess electricity they generate and send back to the grid. This credit can be used to offset the cost of electricity they consume when their solar panels are not generating enough electricity .

  3. Rebates: Some utility companies offer rebates to customers who install solar panels. These rebates can help offset the upfront cost of installing solar panels .

  4. Grants: Some states offer grants to homeowners who install solar panels. These grants can help offset the upfront cost of installing solar panels .

  5. Sales Tax Exemptions: Some states offer sales tax exemptions for solar panel installations. This can help reduce the overall cost of installing solar panels 4.

It is important to note that these incentives vary by state and utility company. It is recommended that you consult with a professional tax advisor to determine which incentives are available to you .


Grants for installation: There are several grants available for solar power. The U.S. Department of Energy (DOE) Solar Energy Technologies Office (SETO) supports funding opportunities on photovoltaics, concentrating solar-thermal power, systems integration, technology to market, and soft costs projects. These funding opportunities encourage collaborative partnerships among industry, universities, national laboratories, federal, state, and local governments and non-government agencies and advocacy groups. Solicitations may include financial or technical assistance .

In the UK, there are two grants that may help you buy solar panels for your home: the Energy Company Obligation scheme (ECO4) and the Home Upgrade Grant. ECO4 can provide up to £14,000 towards energy-saving initiatives for your home if you qualify..

The Canadian government has also announced a grant for homeowners to make energy-efficient retrofits to their primary residences. Homeowners will be able to receive grants of up to $5,000 to make energy-efficient retrofits to their primary residences, and up to $600 to help with the cost of home energy evaluations .

I hope this information helps!


Wednesday, August 23, 2023

How to Find and Collect Water, No Matter The Environment


How to Find and Collect Water in Different Environments


Water is one of the most essential resources for survival and health. Without water, you can only survive for a few days, and you will suffer from dehydration, fatigue, headaches, and organ failure. However, finding and collecting water in different environments can be challenging and risky. You may face water scarcity, contamination, or competition from other people or animals. Therefore, you need to know how to find and collect water in different environments using various methods and tools.

In this article, we will cover the main sources and methods of water collection in different environments, such as rain, snow, dew, streams, lakes, wells, hydrants and other urban water sources as well as plants. We will also explain the advantages and disadvantages of each source and method, and provide some tips on how to improve the quality and safety of the water you collect.

Rainwater

Rainwater is one of the easiest and cleanest sources of water in a survival situation. Rainwater is usually free of contaminants, pathogens, and chemicals, and it can provide a large amount of water in a short time. However, rainwater is not always available or reliable. You may face droughts, storms, or pollution that can affect the availability and quality of rainwater. Therefore, you need to know how to collect rainwater using different methods and tools.

One of the simplest methods of collecting rainwater is using tarps. Tarps are large sheets of waterproof material that can catch and funnel rainwater into containers. You can set up tarps by tying them to trees or poles at an angle, or by digging a hole in the ground and lining it with a tarp. You can also use buckets, barrels, or gutters to collect rainwater from roofs or other structures.

Some tips on how to improve the quality and safety of rainwater are:

  • Use clear or light-colored tarps to avoid leaching chemicals or dye from the material.
  • Boil the rainwater for at least one minute to kill any bacteria or viruses that may have been introduced by birds or insects.
  • Add a few drops of bleach per gallon of water to disinfect and preserve the rainwater.

Snow and Ice

Snow and ice are another abundant and easy source of water in cold environments. Snow and ice are usually fresh and pure, as they are formed from frozen water vapor. However, snow and ice also have some drawbacks as a source of water. You need to melt them before you can drink them, which requires energy and time. You also need to be careful not to consume too much snow or ice at once, as they can lower your body temperature and cause hypothermia.

One of the easiest methods of collecting snow and ice is using shovels. Shovels are tools that can scoop up snow or ice from the ground or other surfaces. You can also use pots, pans, or plastic bags to collect snow or ice from trees or roofs. You can then melt the snow or ice using fire, solar heat, or body heat.

Some tips on how to melt snow and ice safely and efficiently are:

  • Use clear or white snow or ice to avoid contaminants or impurities.
  • Crush or chop the snow or ice into small pieces to speed up the melting process.
  • Add some liquid water to the snow or ice to prevent scorching or boiling over.
  • Use a metal container with a lid to conserve heat and prevent evaporation.

Dew

Dew is another simple and clean source of water in humid environments. Dew is formed when water vapor condenses on cool surfaces at night. Dew is usually safe to drink without purification, as it has not been exposed to soil or air pollution. However, dew is also a scarce and unpredictable source of water. You may not get enough dew to satisfy your thirst, or you may not get any dew at all depending on the weather conditions. Therefore, you need to know how to collect dew using different methods and tools.

One of the simplest methods of collecting dew is using cloths. Cloths are pieces of fabric that can absorb dew from grass or leaves. You can then wring out the cloths into containers or directly into your mouth. You can also use sponges or plastic sheets to collect dew from rocks or metal surfaces.

Some ways to increase the amount and quality of dew are:

  • Choose a location that is exposed to cool air currents and away from heat sources.
  • Collect dew early in the morning before the sun evaporates it.
  • Use clean and absorbent materials that do not contain chemicals or dye.

Streams and Lakes

Streams and lakes are one of the most common and accessible sources of water in most environments. Streams and lakes can provide a large quantity of water that is constantly flowing and replenishing. However, streams and lakes also have some challenges and risks as a source of water. You may face contamination, variability, or competition from other people or animals. Therefore, you need to know how to collect water from streams and lakes using different methods and tools.

One of the easiest methods of collecting water from streams and lakes is using bottles. Bottles are containers that can hold water from streams or lakes. You can simply fill up bottles from the surface or the middle of the water source. You can also use cans or hoses to collect water from streams or lakes.

Some steps to purify water from streams and lakes are:

  • Filter the water through a cloth, coffee filter, or sand to remove dirt, sediment, or debris.
  • Boil the water for at least one minute to kill any bacteria, viruses, or parasites that may be present in the water.
  • Use chemical disinfectants, such as chlorine bleach, iodine, or chlorine dioxide tablets, to kill any remaining pathogens or improve the taste of the water.

Wells

Wells are another reliable and quality source of water in many environments. Wells are holes or shafts that tap into underground aquifers or springs that contain fresh and clean water. Wells are usually protected from surface contamination and pollution, and they can provide a steady supply of water throughout the year. However, wells also have some disadvantages and challenges as a source of water. You may face depth, maintenance, or access issues when collecting water from wells. Therefore, you need to know how to collect water from wells using different methods and tools.

One of the simplest methods of collecting water from wells is using buckets. Buckets are containers that can hold water from wells. You can lower buckets into wells using ropes or chains, and then pull them up when they are full. You can also use pumps or ropes to collect water from wells.

Some precautions to take when collecting water from wells are:

  • Check the water level of the well before lowering or raising buckets or pumps, to avoid damaging the equipment or wasting water.
  • Test the water quality of the well periodically, using kits or strips, to detect any changes in pH, hardness, or contamination.
  • Seal the well properly after collecting water, to prevent dirt, insects, or animals from entering or contaminating the well.

Hydrants and Other Urban Water Sources

Hydrants and other urban water sources are one of the most available and convenient sources of water in urban environments. Hydrants and other urban water sources are connected to municipal water systems that deliver treated and pressurized water to buildings and streets. Hydrants and other urban water sources can provide a large amount of water in a short time, and they can be easily accessed by anyone. However, hydrants and other urban water sources also have some drawbacks and dangers as a source of water. You may face safety, legality, or quality issues when collecting water from hydrants and other urban water sources. Therefore, you need to know how to collect water from hydrants and other urban water sources using different methods and tools.

One of the easiest methods of collecting water from hydrants and other urban water sources is using wrenches. Wrenches are tools that can open or close valves on hydrants or other urban water sources. You can use wrenches to turn on or off hydrants or other urban water sources, and then fill up containers or hoses with water. You can also use pliers or hoses to collect water from hydrants or other urban water sources.

Some potential hazards of collecting water from hydrants and other urban water sources are:

  • Leaks: Leaks are holes or cracks in pipes or valves that cause water to escape or spray out of hydrants or other urban water sources. Leaks can waste water, reduce pressure, or damage equipment.
  • Rust: Rust is a reddish-brown substance that forms on metal surfaces when they are exposed to oxygen and moisture. Rust can corrode pipes or valves, affect the taste and color of water, or introduce harmful bacteria into the water.
  • Chemicals: Chemicals are substances that are added to municipal water systems to treat or disinfect the water. Chemicals can include chlorine, fluoride, or lead. Chemicals can affect the taste and smell of water, cause allergic reactions, or pose health risks.
  • Bacteria: Bacteria are microscopic organisms that can grow in pipes or valves when they are not used or maintained properly. Bacteria can include E. coli, Legionella, or Salmonella. Bacteria can cause infections, illnesses, or diseases.

Plants

Plants are another diverse and fresh source of water in many environments. Plants are living organisms that absorb and store water from the soil or the air. Plants can provide a small but steady amount of water throughout the year, and they can also offer some nutritional or medicinal benefits. However, plants also have some difficulties and dangers as a source of water. You may face seasonality, identification, or toxicity issues when collecting water from plants. Therefore, you need to know how to collect water from plants using different methods and tools.

One of the simplest methods of collecting water from plants is using cutting. Cutting is a method that involves cutting or breaking plant parts that contain water, such as stems, roots, or fruits. You can then squeeze or suck the water out of the plant parts into containers or directly into your mouth. You can also use transpiration to collect water from plants. Transpiration is a method that involves wrapping a plastic bag around a leafy branch and letting the sun heat up the bag. The water vapor from the plant will condense on the bag and drip into a corner.

Some examples of plants that are good sources of water are:

  • Cacti: Cacti are succulent plants that store water in their stems, roots, or fruits. You can cut open a cactus and scoop out the pulp or juice. Be careful not to touch the spines or eat the skin, as they can cause irritation or poisoning.
  • Bamboo: Bamboo is a grass that has hollow stems that contain water. You can cut a bamboo stem near the base and collect the water that drips out. You can also tap a bamboo stem with a knife or a nail and insert a straw or a tube to drink the water.
  • Vines: Vines are plants that have long and flexible stems that climb or creep on other plants or structures. You can cut a vine near the ground and near the tip and collect the water that flows out. Be careful not to cut poisonous vines, such as poison ivy or poison oak, as they can cause rashes or blisters.
  • Fruits: Fruits are edible plant parts that contain water, sugar, and vitamins. You can eat fruits raw or squeeze them to extract the juice. Some fruits that are good sources of water are coconuts, watermelons, oranges, and grapes.

Conclusion

In this article, we have covered the main sources and methods of water collection in different environments, such as rain, snow, dew, streams, lakes, wells, hydrants and other urban water sources as well as plants. We have also explained the advantages and disadvantages of each source and method, and provided some tips on how to improve the quality and safety of the water you collect.

Water is vital for survival and health, but it can also be scarce or contaminated in many situations. Therefore, you need to be prepared and knowledgeable about how to find and collect water in different environments using various methods and tools.

We hope this article has been helpful and informative for you. If you have any questions or comments about finding and collecting water in different environments, please feel free to share them with us. We would love to hear from you! 😊

Featured

Easy Banana Trees for Gardening Beginners.

  Easy Banana Trees for Gardening Beginners. Introduction Welcome, Gardeners, Preppers, and Homesteaders. Isn’t it amazing how gardening can...